Port forwarding router
- , by Alarmsysteem Expert
- 2 min read
If you purchased an IP camera or recorder, of course you would like to see the footage on your cell phone. To see this, you need to set up your router correctly. In doing so, we are happy to help you with these step-by-step instructions. This is a guideline, your system may be in English or just slightly different from our instructions.
IP camera forwarding - Three simple steps
Step 1: Setting up the correct port
Make sure the camera or recorder is connected to the router, you can then enter the IP address into your Internet browser. Log in with your username and password.
Once logged in, go to "Network Settings," then port. There you will see 3 port numbers listed. If you do not change these, open port 80, 8000, and port 554 in the router. See the image below: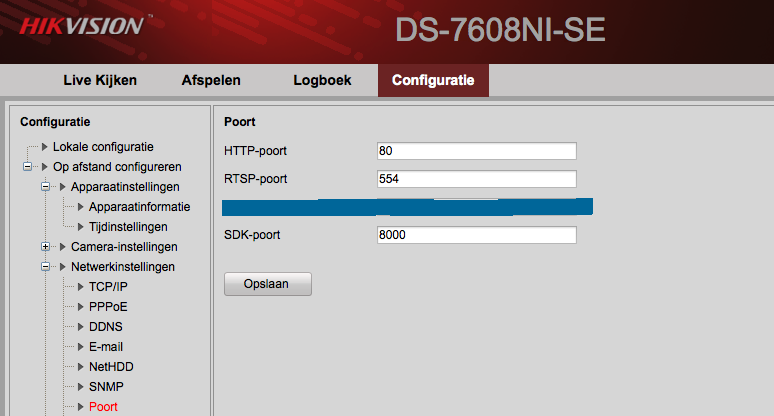
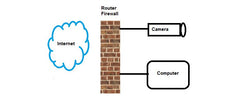
Step 2: Setting up the router
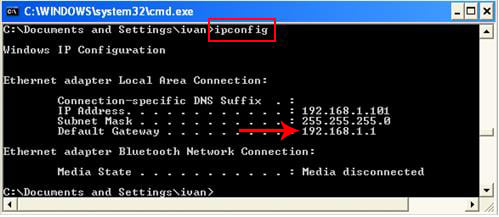
Next you need to find out the ip address of your router. Go to "Start" menu, type "cmd" in the search bar and press "enter. This will open a control window. In the window, type "ipconfig" and press "enter. This brings up information such as your IP address and Default Gateway (ip address router).
Note the series of numbers listed to the right of 'Default Gateway', you will need these later.
Note: Your Default Gateway may be different from the one in the picture, this is normal.
Log in to your router. You do this by entering the router's IP address in the Internet browser, so in this case it is 192.168.1.1
Go to the router's settings and to the 'Forwarden' or 'Port forwarder' page.
For both 'Internal Port' and 'External Port', enter the selected port number of the camera or recorder. Under 'IP address', enter the IP address of the camera or recorder. Under "Protocol," select "TCP. Check the Enable box to apply the settings. Click "Apply" to complete the action.
Below is an image of a KPN Experiabox Router: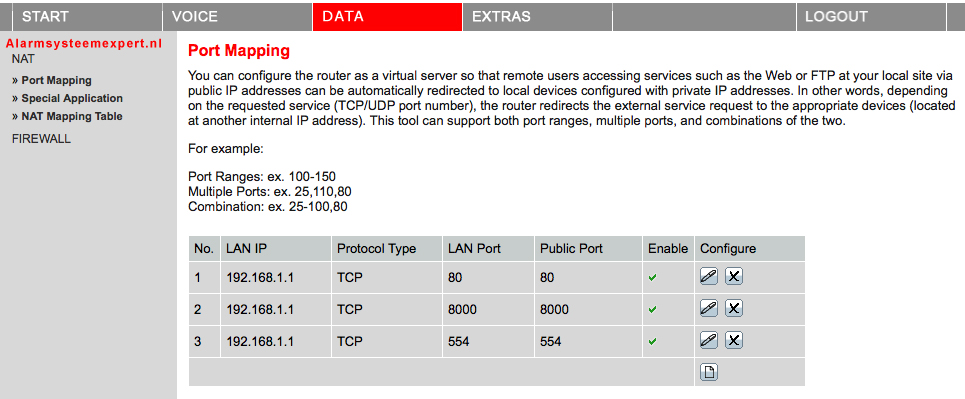
Step 3: Setting up the application on your mobile device:
Download the Hikvision IVMS-4500 app from the app store.
Find your external IP address via the website www.myip.nl , you will need it later in the app: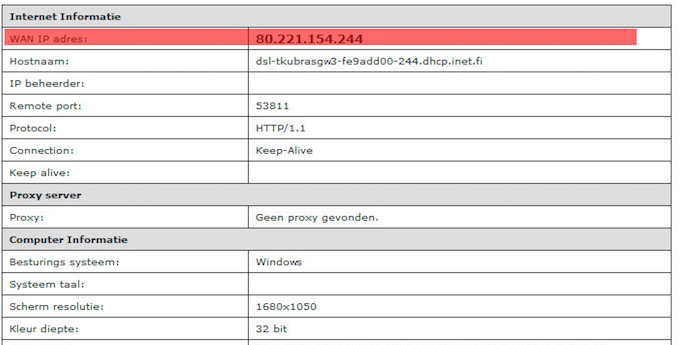
Once you have downloaded the Hikvision app, launch it.
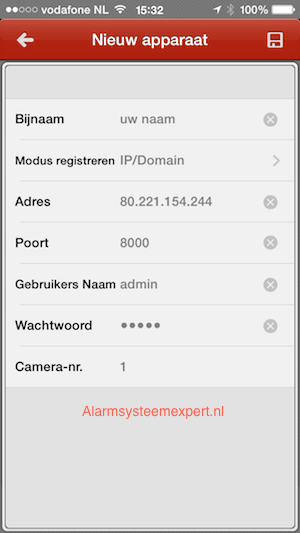
Touch the little button at the top left, then this screen appears: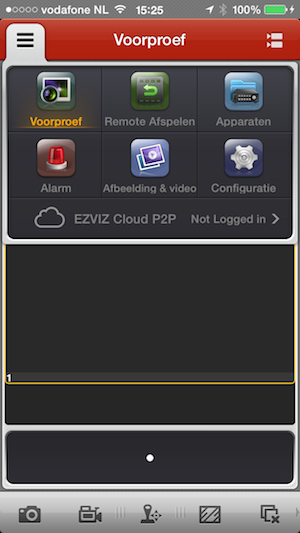
Then go to ''devices'' and press the plus sign (+)
Then continue filling in the fields: